Installing JetPack 4.2 - NVIDIA SDK Manager
|
|
Overview
JetPack 4.2 should be installed using The NVIDIA Software Development Kit (SDK) Manager which is a tool that bundles developer software and provides an end-to-end development environment setup solution for NVIDIA SDKs.
This wiki page is a summary of how to install JetPack via the NVIDIA SDK Manager. If you have required additional details feel free to review the following resources:
Requirements for Jetson
- Ubuntu Linux 16.04 or 18.04 x64 host-machine with working Internet connection.
- Memory: 8GB
- A minimum of 25GB free disk space on the system volume is needed for each full (host and target) deployed SDK version.
- X11 must be enabled on the host.
Install NVIDIA SDK Manager
1. Download NVIDIA SDK Manager.
2. Install debian package
sudo apt install ./sdkmanager-[version].[build#].deb
Install JetPack 4.2
Launch SDK Manager and enter the credentials for your account type, and click Login.
sdkmanager
Step 1: Setup the Development Environment
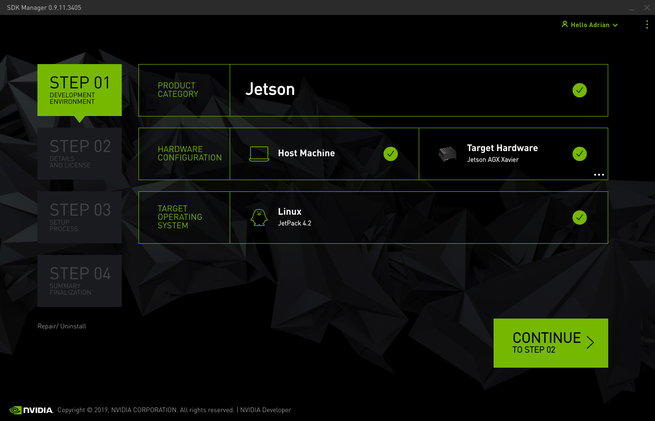
Select product category, hardware configuration, and target operating system, then press continue.
For example to build JetPack for Jetson AGX Xaver:
- Jetson product.
- Host Machine and Target Hardware: Jetson AGX Xavier
- Linux Jetpack 4.2
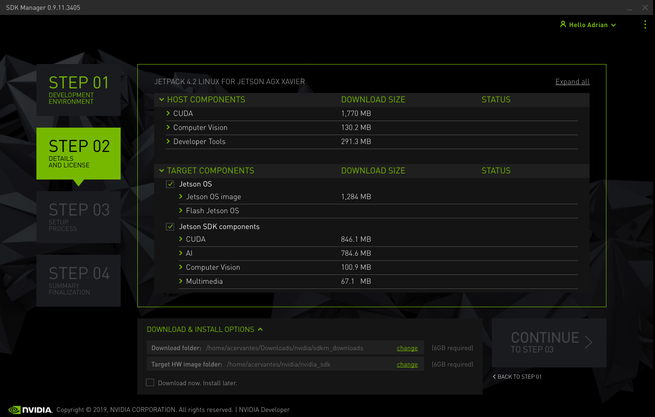
Step 2: Review Components and Accept Licenses
- Review host and target components that will be installed and accept the terms and conditions of the license agreements.
- You can also select your desired download and target HW image folders by clicking "Download & Install Options".
- Press continue
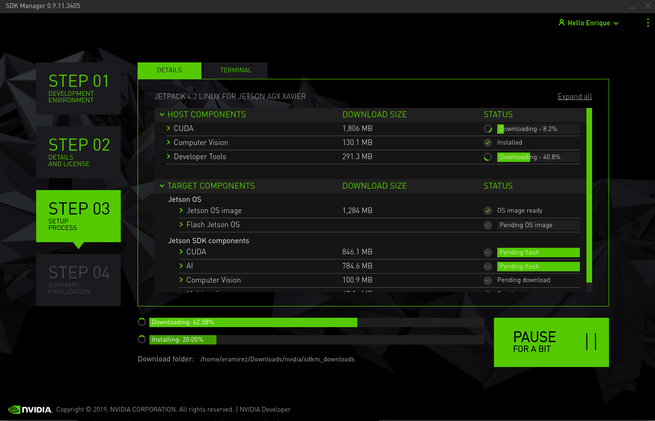
Step 3: Installation
A security window will appear, so enter your password to proceed. Then the download and installing process will begin.
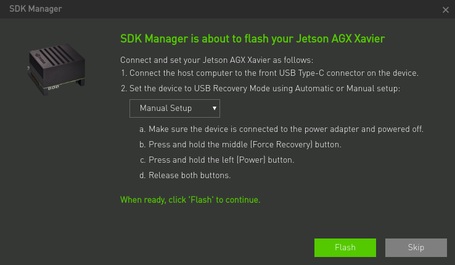
A window will appear when the image is ready to be flashed into the target board:
- Select manual setup and put the board into recovery mode.
- When the flash is finished, connect the keyboard, mouse, and monitor to the target board in order to set the initial configuration (language, country, username, and password) for the Jetson system.
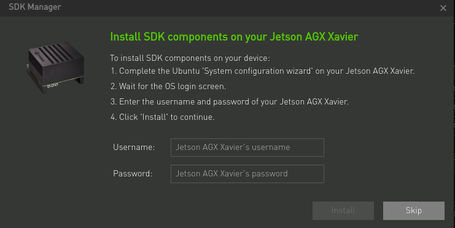
A new window will appear asking for the Jetson's username/password in order to install components. You can skip this if you just need a basic setup.
Step 4: Finalize Setup
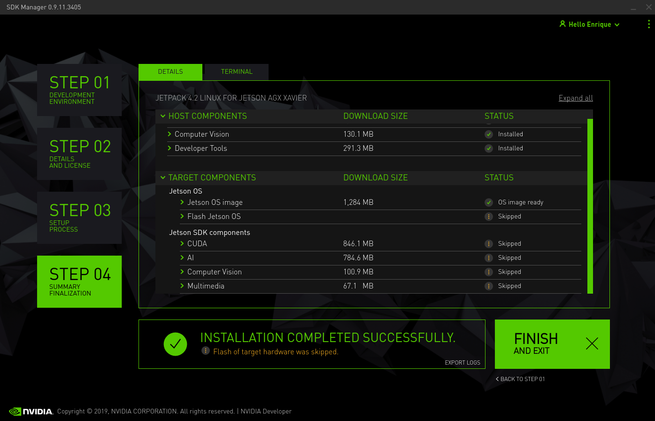
At the end you will see a summary of the components installed, just press "Finish and Exit"
Links
|
RidgeRun Resources | |||||||||||||||||||||||||||||||||||||||||||||||||||||||
| |||||||||||||||||||||||||||||||||||||||||||||||||||||||
|
|||||||||||||||||||||||||||||||||||||||||||||||||||||||
| Visit our Main Website for the RidgeRun Products and Online Store. RidgeRun Engineering informations are available in RidgeRun Professional Services, RidgeRun Subscription Model and Client Engagement Process wiki pages. Please email to support@ridgerun.com for technical questions and contactus@ridgerun.com for other queries. Contact details for sponsoring the RidgeRun GStreamer projects are available in Sponsor Projects page. |  
|
