Difference between revisions of "Getting Started Guide for Xilinx Zynq Ultrascale+"
| Line 6: | Line 6: | ||
<div class="ecwid ecwid-SingleProduct-v2 ecwid-SingleProduct-v2-bordered ecwid-SingleProduct-v2-centered ecwid-Product ecwid-Product-78957111" itemscope itemtype="http://schema.org/Product" data-single-product-id="78957111"><div itemprop="image"></div><div class="ecwid-title" itemprop="name" content="Xilinx Zynq Ultrascale+"></div><div itemtype="http://schema.org/Offer" itemscope itemprop="offers"><div class="ecwid-productBrowser-price ecwid-price" itemprop="price" content="2499" data-spw-price-location="button"><div itemprop="priceCurrency" content="USD"></div></div></div><div customprop="options"></div><div customprop="addtobag"></div></div><script type="text/javascript" src="https://app.ecwid.com/script.js?7804024&data_platform=singleproduct_v2" charset="utf-8"></script><script type="text/javascript">xProduct()</script> | <div class="ecwid ecwid-SingleProduct-v2 ecwid-SingleProduct-v2-bordered ecwid-SingleProduct-v2-centered ecwid-Product ecwid-Product-78957111" itemscope itemtype="http://schema.org/Product" data-single-product-id="78957111"><div itemprop="image"></div><div class="ecwid-title" itemprop="name" content="Xilinx Zynq Ultrascale+"></div><div itemtype="http://schema.org/Offer" itemscope itemprop="offers"><div class="ecwid-productBrowser-price ecwid-price" itemprop="price" content="2499" data-spw-price-location="button"><div itemprop="priceCurrency" content="USD"></div></div></div><div customprop="options"></div><div customprop="addtobag"></div></div><script type="text/javascript" src="https://app.ecwid.com/script.js?7804024&data_platform=singleproduct_v2" charset="utf-8"></script><script type="text/javascript">xProduct()</script> | ||
</html> | </html> | ||
| − | For more information please visit our | + | For more information please visit our http://www.ridgerun.com/store/!/Xilinx-Zynq-Ultrascale%2B/p/78957111/category%3D16319325 online store] or [http://www.ridgerun.com/#!contact/c3vn contact us link] |
</td></tr></table> | </td></tr></table> | ||
Revision as of 09:31, 26 January 2017
|
|
Introduction
On this page you are going to find all the necessary information to start from scratch to use the RidgeRun SDK on your Ultrascale+ zynq ZCU102 board.
- First section, configure serial access, tftp and NFS.
- Second sections, instructions on how to install required software like Xilinx SDK.
- Third section, SDK configuration.
On the rest of this document, we refer as $DEVDIR to the path where the RidgeRun SDK for Ultrascale+ Zynq ZCU102 EVM is installed.
Also it is important to mention that the Eval SDK for the Ultrascale+ zynq ZCU102 can be obtained from Ridgerun downloads section at: http://www.ridgerun.com
Basic preliminary work
Setting up serial access to the Linux console
You can use termnet to control u-boot and linux. For this purpose, the board needs to be connected to the same network as the host computer. This is useful because the board doesn't have to be directly connected to the PC containing the SDK.
If you use the serial port to control u-boot and Linux. The picocom terminal emulator work well for this purpose.
Setting up a TFTP server
If you are planning to use the SDK's installer to install images generated by the SDK in SPI-NOR, installing a TFTP server you will speed up downloads to the target hardware by using TFTP.
Setting up a NFS server
For application development, it is convenient to use root NFS mount file system for the target hardware. This allows you to rebuild your application on the host and immediately run the application on the target hardware with no interveining steps. You host PC needs to be configured as a NFS server for this in order to work properly.
Installing Toolchains and XSDK
Need to download Xilinx SDK "XSDK" for getting toolchain and image generator software. XSDK can be downloaded from: https://www.xilinx.com/support/download/index.html/content/xilinx/en/downloadNav/embedded-design-tools.html
Select SDK 2016.3: Linux Self Extracting Web Installer You need to complete Xilinx registration process in order to download. File is around 1.3Gb
Change permissions to XSDK installer and execute:
cd ~/Downloads/
chmod 777 Xilinx_SDK_2016.3_1011_1_Lin64.bin
./Xilinx_SDK_2016.3_1011_1_Lin64.bin
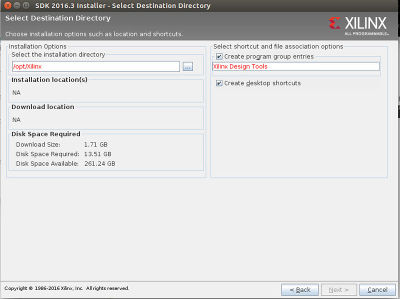
Install XSDK 2016.3 at /opt/Xilinx/Downloads.
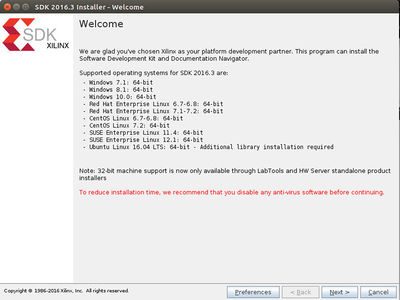
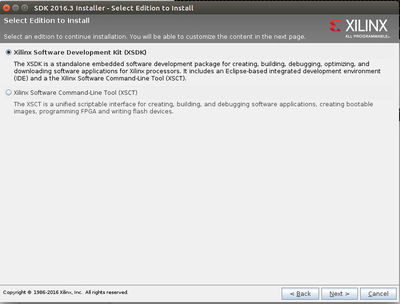
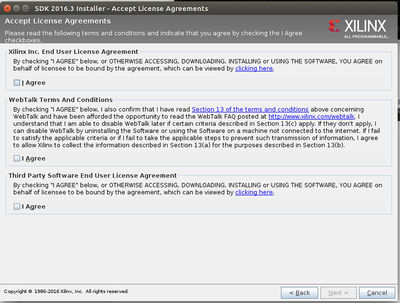
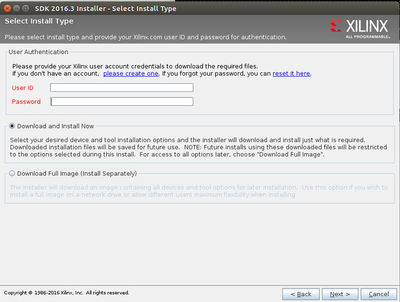
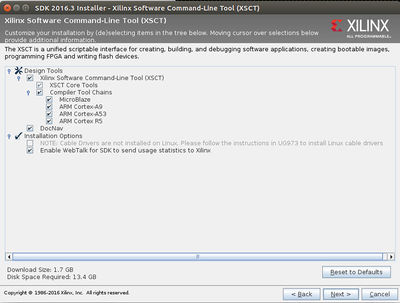
XSDK Install process images:
After installing a directory structure similar to the one shown below will be obtained:
ls /opt/Xilinx/SDK/2016.3
bin  data  doc  eclipse  gnu  lib  scripts  settings64.csh  settings64.sh  tps
Ultrascale+ File System
Ridgerun SDK is able to use different types of file systems:
- Basic file system created by Ridgerun SDK
- Ridgerun SDK is in charge of building basic applications to deploy this filesystem.
- This is a limited fs, but SDK has all Ridgerun classes to add more applications if needed.
- Very small footprint.
- File system with Busybox and Gstreamer.
- Basic Debian precompiled file system created by Ridgerun SDK (Still not available)
- Ridgerun provides a debian precompiled file system that is able to get packages with apt-get for aarch64
- Able to get applications from Debian repositories.
- Small footprint, allows the user to install packages as required
- Precompiled file system for ARM
- User just needs to indicate path for file system.
- Just available for Network File System (NFS).
- Any ARM file system can be used, but a precompiled and very complete File System can be obtained from: http://www.wiki.xilinx.com/Zynq+UltraScalePlus+MPSoC+-+Ubuntu+Desktop+Step+by+Step+Guide
- Instructions for using precompiled File System:
cd ~/Downloads
unzip Ubuntu_Source_Release.zip
chown $USER /opt/
mkdir /opt/ridgerun/downloads/
mkdir /opt/Xilinx/UbuntuFS
cd /opt/Xilinx/UbuntuFS
cpio -idv < ~/Downloads/Ubuntu_Source_Release/Linux_Files/rootfs_cpio/ZCU102_Ubuntu_2_rootfs.cpio
At the end you will obtain FS at the directory:
/opt/Xilinx/UbuntuFS$ ls
@!        dev          home     lost+found  proc     run              sbin  usr
bin       etc          include  media       qt       run_cube_del.sh  srv   var
boot      ffmpeg       lib      mnt         QT_cube  run_cube.sh      sys
cube_new  glmark2.png  log      opt         root     run_desktop.sh   tmp
Ridgerun SDK config, build and install
Download Ultrascale+ zynq ZCU102 eval SDK from Ridgerun store
Download SDK from Ridgerun downloads, Evaluation SDKs: http://www.ridgerun.com/downloads
1. Set your environment variables
  cd $DEVDIR
 `make env`
2. Start build process
  cd $DEVDIR
 make
Configuration menu will be deployed
By default the SDK is configured for creating a demo SD card image with NFS. Exit and save configuration, SDK will continue building.
Install
After build process finishes, use make install in order to create SD card image at $(DEVDIR)/images/
make install
And follow instructions to store sdcard.img at SD:
  You can use the image file to flash an SD card:
    1. Plug your SD card (say it is device /dev/sdX)
    2. Unmount it ('sudo umount' should help)
    3. Flash: sudo dd bs=1M if=$(DEVDIR)/images/sdcard.img of=/dev/sdX
Installation complete
