GstSEIMetadata - Examples - Latency Measurement Example
| GstSEIMetadata | |
|---|---|
 | |
| GstSEIMetadata Basics | |
|
|
|
| Getting Started | |
|
|
|
| User Guide | |
|
|
|
| Examples | |
|
|
|
| Performance | |
|
|
|
| Contact Us |
GstSEI Latency Measurement Example
GstSEI also includes some examples of how can be used the element, the latency measurement example uses the seimetatester element to insert the time when the buffer flow for the element, insert that time as metadata with the seiinject, and send the buffer with UDP and in receiver gets the buffer by UDP, take the metadata with seiextract and compares the actual time when the buffer flow for the receiver and the time in the metadata.
Pipelines
The example uses the following pipeline template for the sender:
v4l2src device=%s ! videoconvert ! tee name=t ! x264enc speed-preset=ultrafast tune=zerolatency key-int-max=15  \
! seimetatester ! seiinject !                                                                                   \
queue name=%s min-threshold-time=0000000000 max-size-buffers=0 max-size-bytes=0 max-size-time=0                 \
! rtph264pay ! udpsink host=%s port=%s t. ! queue !                                                             \
textoverlay name=%s text=\"Added delay: 0 ms\"! queue ! xvimagesink sync=false async=false
And for the receiver use the following pipeline template:
udpsrc address=%s port=%s  !                                                                                   \
application/x-rtp,media=video,clock-rate=90000,encoding-name=H264,packetization-mode=1,profile-level-id=640014 \
 ! rtph264depay ! queue ! seiextract name=%s ! avdec_h264 ! textoverlay name=%s !                              \
xvimagesink sync=false async=false
How to used
After installing the element with the steps of Building GstSEIMetadata, also this example is going to be installed in the system.
First, it's necessary to run the sender example like the following.
maumontero@maumontero-Inspiron-5577:~ $ gstsei_latency_measurement_sender
gstsei_latency_measurement_sender can run with the following parameters: ./gstsei_latency_measurement_sender source_device_path receiver_ip receiver_port
Running sender with: ./gstsei_latency_measurement_sender /dev/video0 127.0.0.1 5555
Run gstsei_latency_measurement_receiver with: ./gstsei_latency_measurement_receiver 127.0.0.1 5555
The sender gives three following inputs.
- source_device_path: The camera source path that is going to be used. (default: /dev/video0)
- receiver_ip: The IP for the device where the receiver is going to run. (default: 127.0.0.1)
- receiver_port: The port for the device where the receiver is going to run. (default: 5555)
After running the sender a window is going to open like the following.
Now in the receiver device, it's necessary to run the receiver command like is showed in the sender output. In this case, like the following.
maumontero@maumontero-Inspiron-5577:~ $ gstsei_latency_measurement_receiver 127.0.0.1 5555
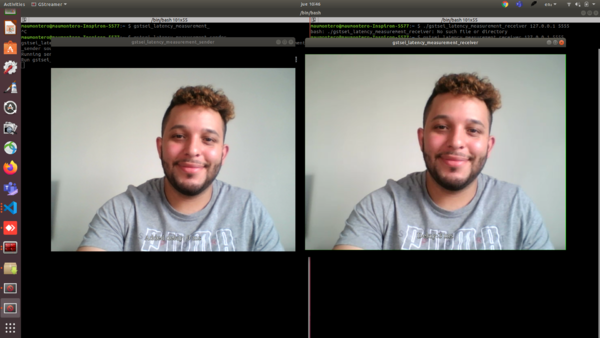
Finally, after running the receiver command the output should look like the following.
Also, the demo lets you increase or decrease the delay, by clicking the sender window and using the up/down arrow keys, the time that we increase or decrease is going to affect the receiver delay like the following.

